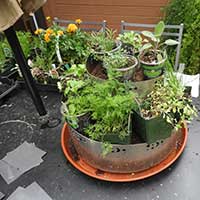
Step-by-Step Guide to Planting an Herb Spiral Garden
What you will need
- Pot feet or saucer spacers
- Saucer
- Potting soil (if using on a deck or patio)
- Soil amendments
- Coffee filters
- Trowel
- Plants
- Planting map
Select the Herbs
Determine the herbs you will want in each zone. Figure eight or nine plants in our smaller spiral and ten to twelve in the larger versions. So, with five zones you are averaging two plants per zone. Remember, you want a few herbs from each zone. You can fudge the lines between the zones if you have three types in one zone and just one in an adjacent one. Refer to the Herb Planting Map for ideas.
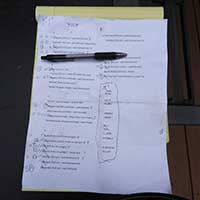
Plan the Planting
Use the Planting Worksheet to sketch out what goes where. Remember things like shade and soil types if you are getting really precise, and yes, you can have different soil types in different zones. Once you have your maps of herbs and their placement within the spiral you are ready to consider placement of the spiral itself.
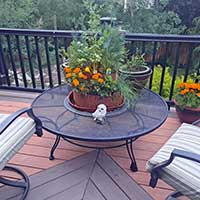
Pick your Placement
Time to think about placement. Once the spiral is filled with soil and water it will become heavy and moving it is not recommended. So, deck, patio, porch, garden? In cooler northern climates full sun can work well. Hotter locales will want to lean towards partial sun/shade, especially if you have hot days. Filtered sun is great too. Keep in mind watering needs, every other day can work but hot climes may need water every day. Is water easily accessible or will you be carrying it each time?
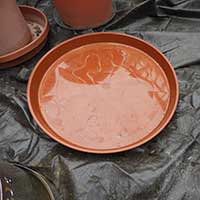
Saucer or sans Saucer?
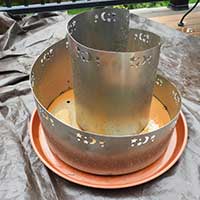
Once you have a spot picked, will you want a saucer? If a permanent placement on dirt is selected, then a saucer is not needed. However, decks, patios and anytime that moving the spiral garden is anticipated then a saucer is a must. The saucer’s inside diameter should be at least two inches larger than the base of the unit. The tough, plastic, flexible saucers are our favorite as they tend to last longer in our experience. Now, go ahead and get your unit placed and positioned the way you want it.
Don't forget to make sure there is room for water to drain out of holes in bottom of spiral. Add some spacers if needed.
Proper Positioning
Positioning the unit is important when planting herbs. We recommend that the highest point of the innermost wall be positioned with the outside of the curve facing north. This leaves the top planting area, zone A, facing south and gives those sunnier, Mediterranean plants the most exposure to the sun. Check the Planting Map if in doubt.
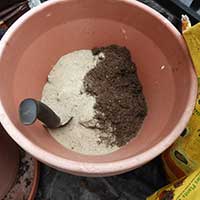
Soil Selection
Prepping is next. If you are going to be fine tuning the soil for the different zones this is the time to get the components such as sand, clay, potting soil, mulch, and compost ready. If just using regular potting soil throughout, then you can keep things simple with just a high-quality soil. Place the unit on the saucer or ground in the spot you will be using. If using a saucer, be sure to there is space between bottom of unit and saucer to create water/air flow for drainage, use spacers like pebbles if need be.
Drainage
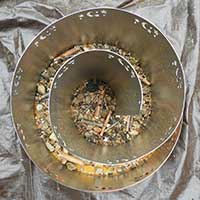
After the unit is in place your next step is one that starts many a discussion. Should you add a material such as, gravel, packing peanuts, cardboard or whatever you have in a layer on the bottom before adding soil. Our suggestion is to use coffee filters placed in a single layer across the bottom to cover the drain holes. This will prevent the holes from getting clogged, provide your plants the most dirt possible, and keep you from contaminating the soil with things like Styrofoam. We also use twigs, pebbles and bark to provide a natural drainage path. The choice is yours.
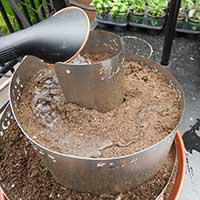
Fill 'er Up
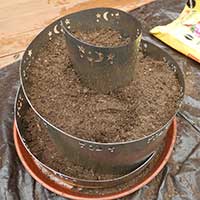
Now add a layer of potting soil about 3”-4” deep all the way around. If you are going to be using amended soil in different zones this is the time to mix that up and begin carefully adding it where you want. Remember that the soil will compact down after watering, sometimes quite a bit so filling to the top of the wall when it is going in dry is ok. Once it is filled, we like to give it a gentle soaking. This settles the soil and provides a nice moist environment for the herbs to start with. Remember, new soil will suck up a lot of water. If you find the soil is too high even after watering, remove some to get the level to within 1"-2" of the top edge of the wall

Do the Dam
As you begin to plant your herbs you will likely want to terrace them a bit using the “dams” provided. Placing them after every two or three plants, roughly at the border between zones, seems to work well. This helps you manage water flow and provides some simple separation for roots and/or soil types. Simply press the dam down into the soil between the plants – not too close to roots – and adjust the height so it sticks out above the soil maybe an inch. We provide some assorted sizes, use the larger ones for higher up and the smaller ones as you get closer to the lower “damp zone”.

Finishing Touches
In the areas where the spiral closes on the outside wall it can get a bit narrow. We don’t recommend trying to squeeze a plant into those spots. Instead, try filling them with some pea gravel or other small stones and let that be a sort of venting area to help the soil shed excess moisture that may accumulate in the lower zone. A few pebbles scattered among the herb can be attractive and also help slow moisture eveaporation.
A Word on Watering
Watering – The way the spiral works best is if you provide similar amounts of water to each zone. It will work its way down to the lowest point of the soil in all zones but, since the plantings are closer to that low point the further around the spiral you go, the plants at the top will have drier soil and the ones at the bottom will naturally have wetter soil. Neat, huh?!
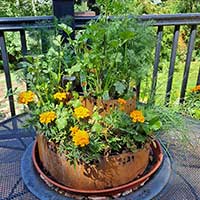
Enjoy!
Congratulations!
Stand back. Take a look at your creation. Revel in the moment, and savor the satisfaction of a job well done.